Pages

Monday, 30 April 2012

Pirate Ogre Fisherman, the Model - Part 3 of 6

This stage is where the model itself all came together. I cut the anchor shalf into two pieces and glued both parts into position on the right hand.

Fishing Rod Greenstuff

Note the crude left-handed mechanism. This is the benefit of trying a dry fit (i.e. using Blu-Tac rather than glue) first. A right-handed (i.e. standard) winding mechanism would have meant the handle would point towards the belly plate and made the 'centre' of the model look far too busy and cluttered.
Fishing Rod Mechanism
Handle is made from sprue and the cut-off handle from an ogre club.

The chain mechanism is another item from Ade's spares box. The chain itself is a standard product available from any decent model or hobbycraft shop.
The eyelets for the chain were made from a paperclip bent to form a loop. This was surprisingly difficult to achieve, I had to eventually resort to using a pair of round nose pliers. I drilled small holes into the rod and glued them into place. Greenstuff was then used to cover the joints and made to look like leather strapping by simply scoring the greenstuff with a scalpel and scribe. Fortunately the rough nature of my manufacturing technique fits in ok with the ogre pirate ogre 'look'.

The base now covered with sand. Wood glue was applied all over the base and then sand was poured over and left overnight. These pirate ogre bases have all been kept deliberately plain and uncluttered.
Friday, 27 April 2012

Pirate Ogre Fisherman, the Build - Part 2 of 6

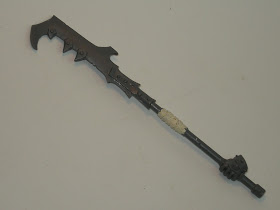
A fisherman character obviously needs a fishing rod. After a great deal of pondering and false starts I found this two-handed weapon which would prove idea for the actual rod itself.
Fishing Rod (well almost)
The ogres right hand removed and initially covered with Milliput, but I don't think I mixed it correctly as it didn't set so I later replaced it with greenstuff.

Initial Mock Up
Note the use of Blu-Tac to position the hands and arms. This is because I still hadn't determined the final design of the mechanism and thus the final position of the limbs.

I had initially thought of using the 'chicken on a hook' part that appears on one of the ogre sprues, intending to show it as being used for bait. However, I occurred to me the fishing rod could be used as a weapon if it had a decent, and big enough, attachment such as a ball and chain. But seeing as they are pirates it seemed more appropriate to use a bloomin' great big anchor. They had cropped up on my previous ogre pirates in the form of belly plate details and tattoos etc. "What a jolly good idea" I smugly thought to myself but the realisation that I hadn't a clue how to make one quickly wiped that smile off my face.

First I thought to get a piece of plastic rod and heat it over a candle/tea light and bend it form the right shape. There are a few drawbacks to this method as I've discovered in the past. It's actually quite difficult to control the amount of bend without melting the plastic completely and dripping hot molten plastic onto your lap or even setting fire to your home (remember kids, I've made these stupid mistakes so you don't have to!).
Ogre sprue - white lines indicate the cut lines.
Staring at the sprue, (which I often do to pass the time of day) I suddenly noticed the curved corner section. Hurrah, it would be perfect. On the same piece of sprue I then quickly spotted another section that would form the body of the anchor. The white lines indicate the part of the sprue that would make up the main body of the anchor.
Anchor
Curved corner section. The sprue is trapezoidal in section so needed to be scraped with a blade and sanded to round off the plastic.
Anchor shaft
The picture above showns a similar section of the sprue that made up the 'T' piece that forms the anchor shaft. Note the liberal use of greenstuff to fill in gaps and add the pointed prongs to the end of the anchor arms.
Anchor Eye
The eye of the anchor where the chain would eventually link round was taken from another spare ogre piece.

Thursday, 26 April 2012

Pirate Ogre Fisherman, the Idea - Part 1 of 6

This is the penultimate pirate ogre I've made for my mate Ade (WargamingForFun) and one of my personal favourites. The idea for this particular model actually came from Ade when we were looking at his (Games Workshop) Ogre Kingdom army. I've already made several models on the pirate ogre theme but I still had a couple more ideas rattling around my brain.
Basic Ogre body
Front View
With this series of posts I hope to demonstrate the step-by-step progress of making, converting and painting a miniature ogre. Apparently the Games Workshop minimum (i.e. tournament standard) to paint and play with a miniature is to use three colours. However with just a bit more time and effort the paint job can be improved enormously using very simple and effective techniques. For instance the model detailed in these posts have, including the base, been painted with just eight basic colours. Hopefully it will also encourage a few more people to have a go at modifying their figures.

I'm not a great painter. I'd like to point out that this isn't false modesty or an attempt at fishing (no pun intended) for compliments. All the figures shown on this blog have been produced using the following relatively simple technique of the 'Block, Wash & Highlight' method (a.k.a. 'Main, Shade & Light'). Don't tell anyone but I actually find painting quite boring. So much so that I have a substantial lead (and plastic) mountain primed and just waiting to be painted. I'd much rather make, modify and scratch-build models and figures etc.

All the parts for this figure came from Ade's bountiful ogre spares box (a modeller's dream). If you need to know precisely what they are, please ask and I'll try and find out.
Once the figure has been cleaned up, mould lines removed etc. the figure was pinned to the base. The belly plate and helmet headpiece were chosen because they reminded me of the 'Tigris of Gaul' character from the 2000 film 'Gladiator' (the one fighting Russell Crowe when he nearly gets eaten by the tiger).
Basic Ogre body
Rear View
As this chap was supposed to be a fisher(man/ogre) I thought he needed to have a few fishy aspects about him. I removed the bones sticking out off the bag and replaced them with a fishtail. I had considered a fish head but, to be perfectly honest, thought tails would be easier to model. Later on I added another tail, mainly because I had left over greenstuff and I didn't want to waste it. Also note the bag still hasn't been glued into place at this stage, just fixed into position with Blu-Tac.
This is a how the bag looks normally
Originally the bag also has a rip with a skull poking through. I cut and sanded this off and smoothed the plastic with liquid poly cement (the type applied with the brush mounted in the cap).

Just another day in Mega-City One.

Just a quick post for everyone that had their formative years influenced by British comics in the 1970/80's.

Wednesday, 25 April 2012

Mega-City Judges, Mongoose Publishing

"The judges are the lawkeepers of Mega-City One, fighting to protect innocent citizens from criminals and scum. Few in number, the judges welcome only the best and the brightest into their ranks, and not all of those survive the 15 year training regime. A force of judges will be very well equipped and able to handle most situations."

 That quick overview from the Mongoose Publishing website.
Way back in the mists of time (or for any younger readers: the late 1970's) my older cousin used to collect the comic 2000AD featuring of course Judge Dredd; my older brother used to buy Starlord (the original home of the Strontium Dog character) and I had the Beano and Dandy. Naturally I used to read all the 'big boys' comics when they were literally handed down to me. 

These three figures, from the Justice Department Box Set by Mongoose Publishing, are painted to match how my brother remembered the Judges from the comic. I've seen the figures painted up with golden eagle on the right shoulder and the left shoulder pad painted yellow, but my brother wanted both to be the same colour. I later checked an old comic and the rule book from the role-player game and saw the shoulder pads were, in fact the same colour, normally a dark shade of yellow. 

The older comics also show the uniform to be a very dark shade of blue (navy?), not black or a lighter shade of blue I've seen in later editions of the comic or models. I assume this is because with black it is difficult to show highlights and shades and still making the image eye-catching. Looking at the uniform now it does seem an odd mix of colours but I still like it (nostalgia is a wonderful thing).
Judge Super Dude (remember him Ade?)

Although I did actually want the uniform to have a satin look the varnish is still wet on some of these photos. The camera was borrowed so I needed to get it back to my friend as soon as.

Tuesday, 17 April 2012

Shropshire Model Show, RAF Museum Cosford 2012 - Part 3 of 3

Sci-Fi and Miscellaneous
'Fantastical Fish-Shaped Submersible'
JJ, Pensnett Model Makers Society
'Fantastical Fish-Shaped Submersible'
JJ, Pensnett Model Makers Society
'Fantastical Fish-Shaped Submersible'
JJ, Pensnett Model Makers Society
The model above is a fantastic steampunk model made by JJ of the Pensnett Model Makers Society, probably one of the best and most proficient modeller's I've ever met. This model won the 'Miscellaneous' competition.

Captain Scarlet
My childhood in model form
Thunderbird 3
A real Dalak transporter
Dalak transporter - note the lack of stairs.

Monday, 16 April 2012

Shropshire Model Show, RAF Museum Cosford 2012 - Part 2 of 3

Aviation
IPMS Avon

IPMS Avon
The vast majority of models on display athe show didn't have any bases. The two examples above show just how much better they look when they do have base.
Add Hansa Brandenburg W29
Shropshire Scale Modellers
Add Hansa Brandenburg W29
Shropshire Scale Modellers
Albatross
Shropshire Scale Modellers
Harrier Special Interest Group
1:72 Scale
Harrier Special Interest Group
1:1 Scale version
Harrier Special Interest Group
Note the matching real Harrier in the background. It was only delivered to the museum in the last few months.


Thursday, 5 April 2012

Shropshire Model Show, RAF Museum Cosford 2012 - Part 1 of 3

In the glorious sunshine last weekend I attended the (relatively) local Shropshire Model Show held at RAF Museum Cosford. This is one of the biggest model shows held in the midlands (if not the country), the added bonus is that it is held in the various halls of the museum.

I also got the chance to meet up with the chaps from the Pensnett Model Makers Society located in their usual spot under the Messerschmitt 410A-1/U2 Hornisse.

As usual all the displays were very impressive. I even managed to get my spending down; I only came any with a few various bits and pieces, masking tape, drill bits etc. books relating to the War of 1812 and Tamiya's 1:35 scale WWII 'BMW R75 with sidecar' and Miniart's 'RuU2 ssian jeep Crew'.

I've split the posts of the photos of models that caught my eye into three sections - 'Military Land & Naval', 'Aviation' and 'Sci-Fi and Miscellaneous.'
Pensnett Model Makers Society
First up:
Military Land & Naval
North Staffs Model Club
German 80cm K (E) Railway siege gun
North Staffs Model Club
 German 80cm K (E) Railway siege gun - Detail
North Staffs Model Club
A34 Comet
'Tide of Iron, Cambrai - 1917'
'Tide of Iron, Cambrai - 1917' - Detail
HMS Exeter

This model caught my eye as it reminded my of an old neighbour, Jim. He was Royal Marine that had served on the HMS Exeter during WWII.
Geoff Taylor's HMS Manchester - Best in Show
The model shown above deservedly show 'Best in Show' in the competition. This was (I believe) largely scratch built and really was 'museum standard'.

Here is a link to a article about the model and far better photos from a local newspaper: HMS Manchester