Showing posts with label late Crusades. Show all posts

Wednesday, 27 August 2014

King Edward I, Ebob Miniatures

I won this impressive figure in a competition run by Burkhard, a short while ago. His entertaining blog can be found (here). I've been fortunate to won quite a few comps this year but this may because I actually entered them in the first place. Now this may sound like stating the bleedin' obvious (it is) but I'm constantly surprised by how many people who don't actually follow that simple advice and then moan that they never win anything. The phrase "you've got to be in it to win it" is blatantly apparent.
This figure bares a strong resemblance to the late, great actor Patrick McGoohan, who played Edward I in the film Braveheart (a term that was originally applied to Robert Bruce and not William Wallace so the least said about that film the better). The figure is from Ebob Miniatures and is part of their Rebellion range. The detail on the model is excellent, especially the lions on the caparison.

Ebob make several interesting miniatures for this period including a number of options for William Wallace. In the same range is a 'Wallace of Ellerslie' figure which is based on the main character in the film Braveheart and is therefore only really suitable for a fantasy figure but there is also a set of figures, mounted and dismounted, called 'Sir William Wallace (Guardian of Scotland)' which are far better historically and aesthetically. The dismounted figure reminded me of a full size model of Wallace in Stirling (?), its been many years since I visited Stirling so this may not even exist any more. 
Burkhard kindly left the base blank so that it could be finished it to match my other figures.
This figure of Edward will (hopefully) see next see action putting the wind up any Welsh forces foolish to face him in future Lion Rampant games.

Wednesday, 29 August 2012

Trebuchet - Part 2 of 2

In this post I will concentrate on the base. I'll go into a bit more detail with this for reasons that will soon become obvious.

Normally I would simply fix the crew to the base as I have done with previous artillery pieces. However because of the Cry Havoc/Siege's unique causality recording system I thought it would be nice not to fix the crew but allow them to be interchanged to show them in at least two of the their states (healthy/wounded or stunned/dead).

Therefore as I was making the main base from cut-off pieces of 4mm MDF I needed to figure out a system that would let me change the figures around. 
After a great deal of pondering and false starts resulted in this cheap and cheerful alternative to buying a special slotted/sabot base for the artillery crew. Using the method described below will give the look a diorama style base but will also allow the practical removal of the figures as required with the Cry Havoc/Siege's rule system. A bonus is that the base will stay relatively thin. 

If you're going to have a go at this method of basing then I would strongly recommend allowing plenty of space to position your model AND figures when you're planning your layout and dimensions of the base, especially if you intend to sand down and/or bevel the edges. I made this fundamental error and had to start all over again after discovering that I couldn't even fit a single figure onto the base properly - d'oh!

I used a few lengths of plastic sprue, ideally the same thickness as the base used for the figures. This ensures that the base of the figure will sit flush with the raised surface of the main base. As plastic sprue is rarely square in section use a sharp blade or shade down one edge so that it forms a ninety degree to the large base. Then bevel the outside edge.

The beveled edge doesn’t have to precise as this will be covered in flock and grass but a shallow angle will help in creating a better final visual result. Remember that its real purpose is to ensure that the figure base blends in with the raised main base as closely as possible.

Try to use an original edge to form the inner side of the pit for the figure if possible, as this will be guaranteed straight and also will be visible when the figure is removed during play. 

Place these plastic strips around a base you tend to use for your figures. When you are happy with the length and position of the strips, drop a small amount of poly cement onto the joints. I wouldn’t recommend using superglue as there is a very strong possibility of sticking the entire assembly, together along with the figure base itself, to your work surface. Using a poly cement at least allows you a few minutes to safely remove the figure and reposition the strips if necessary. I am, naturally, speaking from experience.

When fully dry you can then remove the sharp corners and blend the edges together with sandpaper or a blade. This is now ready to be fixed to the main base. 

Ensuring that the eventual position of the figure won't interfere with the main model, fix the plastic locating square the main base. Try to ensure no glue spreads over into the ‘pit’ as this with be visible when complete.

When texturing the figure engineer's base I used larger stones and bushes to break up the straight lines of the base.

This technique now seems that obvious and simple I’d be surprised I haven't seen it before (actually I probably have and have just convinced myself that it's my idea). I was thinking about calling this method ‘Matt’s Patented Hollow Base Locating Technique’ - catchy title, I know.

The model was painted with a combination of Citadel and Vajello paints.


I've since added a few more tufts to try and break up the outline of the holes.

The 'stone' balls are made from a hard foam-like material, given to me by John from the Pensnett Model Makers Society, I whittled (you can't beat a good whittle) each of the balls into a crude circular shape and left them to look like rough hewn stone. 

Tuesday, 28 August 2012

Trebuchet - Part 1 of 2

This small model trebuchet detailed in these two posts was made as a direct result of a very frustrating encounter with an awful 'Finecast' version from Games Workshop. I may give a blow by blow account in a future post if I can ever be bothered to finish it. The parts are currently lying in a pile, bent and broken, somewhere in a storage box.  I did nevertheless manage to divert a complete disaster by using the resin kit as a template to create the one detailed in this post and which will explain why it looks similar.

The base of the not exactly FineCast (?) GW version,
the less said about it, the better.
Anyway back to my version. This model has been made mainly from balsa, with hardwood round dowel, plastic sprue, copper wire, wooden coffee stirrers and model chain for the various detailing. 
All new and improved WIP hand-built balsa version,
note the original location of the winch. 
As I've just mentioned I used the original individual model parts from the GW model as a initial guide for the main framework. I used lapjoints wherever the beams crossed each other, which were easy to make with balsa. For the main throwing arm/beam I used a hardwood dowel as I thought balsa wouldn't have enough linear strength. I gradually dry-fitted the components piece by piece until I was assured that all the parts went together correctly before they were glued in place.
On my command, unleash the Werther's Originals .. sorry, I meant... 'Unleash Hell!'

As I wanted to add a slide for the stone balls, a feature seen in medieval illustrations of trebuchets, it gradually dawned on me that using the GW model as a guide wouldn't work. The stone and sling would fowl the spindle for the winch mechanism. With this in mind and recalling numerous artillery pieces from various re-enactment societies I moved the spindle and placed it at the very rear of the model.

The counter weight is made from the ubiquitous wooden coffee stirrers, the bolts were made by simply chopping off small sections of a cocktail stick. Once made, I filled the box with scrap pieces of foam and then topped it off with small pebbles to represent large boulders and then filled the gaps with sand all stuck in place with copious amounts of PVA wood glue.

The sling is made from the thin metal wrapper from a tube of tomato puree and all the rope/cables are made from copper wire stripped out from electrical cable. The slide itself is made from wooden coffee stirrers.

At this stage I was considering adding a ratchet mechanism using plastic card but I stopped, put my tools down and actually thought 'That's enough, it's only a gaming piece not a museum piece." 

The model does (or did before I glued everything into place) actually work in the sense that both the arm and counter balance can freely rotate and fully swing. However, I did made the counter balance too large and it hangs too low; in a full scale version it would mash into the framework and do more damage to the crew than any enemy castle.

Tuesday, 7 August 2012

Men-at-Arms (with shield), Crusader Miniatures

Just a quick update for my ongoing Cry Havoc project.
Billmen
These are the completed billmen; eight are required in total for the combined Cry Havoc/Siege scenarios. I've trimmed off some of the spikes of the bills so they look less uniform.

Spearmen

These are all Men at Arms (MCF030) from Crusader Miniatures, now twenty four in total. Another eight are currently being painted, mainly as spearmen. I've already painted their shields using the rest of medieval Shaftesbury floor tiles as a painting guide.

Tuesday, 31 July 2012

Sir William Montagu (Montacute) - Knight, Crusader Miniatures

This figure bares the arms of Sir William Montagu, alias de Montacute, 2nd Baron Montacute (c. 1285–1319) and is the first knight I've painted to match the medieval tiles. His arms, argent three fusils on fess gules, are quite distinctive.


The Montagu family was an old (probably dating back to the Conquest) West Country family who held lands in Somerset, Dorset and Devon.

Montagu saw service with Edward I during the ongoing wars with Scotland and also went on the serve Edward II. He died in Aquitaine, October 1319, where he had been sent be the court to lessen his influence on the king.

His son, also called William, was created Earl of Salisbury. These arms, quartered with those of Monthermer, would remain visible in various coat of arms including those of Warwick the Kingmaker for years to come.

As you'll be able to tell I'm being quite free and easy with the historical time range with my figures for this onging Cry Havoc project (my toys - my rules). These figures are the first knights to be completed that were inspired by the medieval floor tiles from Shaftesbury abbey, Matching spearmen spearmen (seen in this previous post - Link) will complete the small (tiny actually) retinues.

Medieval Floor Tile - Shaftesbury abbey
 
As the note by the floor tile states:
"It was this Montacute (Montagu) that was in a dispute over the ownership of Sherborne castle in 1341 with Robert Wyville, Bishop of Salisbury, which nearly resulted in a trial by combat."

I will go into more detail about this fascinating 'what if' historical in a future posting i.e. after I've finished painting Montagu's adversary, the Bishop of Salisbury.
Montagu's (rather small) retinue
All these models are from Crusader Miniatures, painted straight out the box with no modifications.

You might have noticed that I haven't painted the horse's caparsion to match the shield. Although this would have been relatively easy to do this figure is a substitute for Sir Gilbert in the Cry Havoc game. This character wears a yellow surcoat and carries a white shield with three red stars (or if you want to be technical - argent, three mullet gules) therefore I decided to mirror the illustration from the game and keep the caparison plain and simple.

Monday, 30 July 2012

Othon de Grandson - Knight, Fireforge Games & Crusader Miniatures

This is another figure based on a illustration by Richard Hook the Osprey book 'The Crusades' (Elite Series E19). This time it is the Savoy knight, Othon de Grandson (d.1328).


It was the colourful heraldic shield that initially attracted me but in a happy coincidence the real Othon had a very close connection to Edward I, one that I happened to notice on a recent visit to Beaumaris castle on the isle of Anglesey. This connection resulted in Othon being appointed as first justiciar of North Wales between 1284–1294.

Othon de Grandson (sometimes spelt Otto or Otton de Grandison) was a knight from the Savoy region which is now covers parts of modern day eastern France, western Switzerland and north western Italy.

The English Plantagenet kings had close family ties to the area. Count Philip of Savoy was Edward I's great uncle and also owned him homage for part of his lands. One result of this connection was that many Savoyards joined the English royal household.

Othon de Grandson himself entered the service of English king Henry III and was placed in the household of the young prince Edward, later being knighted in 1268. He became a lifetime friend and confidant of the future king Edward I. As a result many other Savoyards went on to serve with Edward in his Welsh wars.

In 1271 Othon accompanied Edward on the Ninth Crusade where he served at Acre. Here he commanded a small force of English volunteers defending a section of city's walls. During the siege he saved the life of fellow Savoyard Jean I de Grailly, the heraldry of whom I hope to recreate in miniature form for my ongoing Cry Havoc project. It was possible that it was Othon, and not Edward's wife, that it is supposed to have sucked the poison from the wound inflicted by an assassin's blade on the future king.

Interestingly on Edward's return he appointed the builder/mason/architect Master James of Saint George to build the now famous castles in north-west Wales such as Conway, Harlech, Caernarfon and Beaumaris. James was also a fellow Savoyard and is thought to have travelled on Crusade himself. Many of Edward's castles feature architectural details that appear in both north Wales and Savoy but rarely elsewhere.

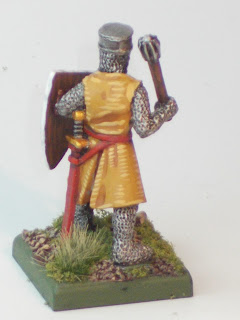
Dismounted knight with mace

A more detailed (i.e. better) history of Othon de Grandson can be found online.

With this character I realised that after looking over the metal and plastic figures I had available I knew I could utilise a dismounted knight from Crusader and modify a mounted plastic Fireforge figure (as the Italian company do not currently make knights on foot) to suit as it is far easier to modify a plastic figure to match a metal figure than visa versa. Although not identical they could be made to look similar enough to suit my purposes.

As I wanted to have a bit of variety with the mounted knights I decided to depict the knight on a unbarded horse. This meant that I would have to use the plastic horse model from the Fireforge 'Mounted Sergeants/Men at Arms' set. To match the metal Crusader figure however I used the head, limbs and body of the mounted knight figure Fireforge 'Teutonic Knights Cavalry' set.


The picture above better illustrates the changes I made to the original model but note that the large horns have already been removed from the other plastic helmet.

After removing the horns/wings from the Teutonic helmet and smoothing the surface I added the tiny vent holes to the faceplate by poking it with a sharp metal scribe. Next I removed the head from the triangular plastic mace, shortened the handle to match the metal version, and replaced it with a metal mace head taken another Crusader figure.

I also rounded off the plastic shield so it resembled the one shown in the Osprey book.

I attempted to copy the shield illustrated in the Osprey book and totally messed it up as I thought the heraldic designs were stylised flowers so painted a simple five petal pattern on the shield. A short time afterwards however by chance I found an online image (link) of Othon's effigy which is in Lausanne Cathedral.

I noticed that the symbol I thought was a stylised flower in the Osprey illustration was actually a scallop shell, quite appropriate as the shell was a symbol of pilgrimage. After a liberal amount of swearing I decided to try a paint the shell symbols over the other pattern.

Although they're not a perfect match, for instance the plastic Fireforge helmet is noticeably larger than the metal Crusader version, I'm pleased with the overall look of both figures and how they turned out.

Friday, 27 July 2012

Peter of Dreux - Knight, Firefore Games & Crusader Miniatures

The matching pair of figures detailed in this post have been painted to represent Peter of Dreux, Duke of Brittany, based on the Richard Hook illustrations of Peter in the Osprey book 'The Crusades' (Elite Series E19).

The livery of Peter of Dreux is alternate squares of blue and gold (designating the house of Dreux) quartered with ermines (representing Brittany), or to be precise 'Chequy or and azure within a border gules a quarter ermine'.

Regarding the model itself I had noticed that fortunately one of the plastic Fireforge mounted sergeants and one of the metal Crusader knights matched each other and bore a close enough resemblance to the illustration to represent this character.

Please note that I intentional didn't fit the horse's tail piece on this model and I'll explain why. I read an interesting discussion on the Fireforge Games Facebook page, where someone pointed out something I'd never noticed before. To paraphrase, someone basically said, "On all the medieval illustrations of fully barded horses the horse's tail is covered and is not visible." Out of curiosity I double checked all my image reference books and was slightly surprised to find that I couldn't see any that showed the tail on a fully caparisoned horse (if anyone can provide a contemporary medieval illustration/glassed glass image or reference etc. showing otherwise I'd genuinely like to see it, it would save me a lot of work in the future!). 

I thought it may be an interesting challenge to make and paint a proper fully barded horse. The problem with this approach is that it left me having to fill a large gap at the rear of the model where the caparison/barding is modelled flapping open. This issue was solved by using a thin sheet of greenstuff and blending it in as best I could to match the folds before it set.


As the mounted figure is depicted as having drawn his sword I cut away the hilt, grip and pommel of the sword the scabbard on the figure's waist. I also cut away a small section of the material from the area beneath the saddle area so as to create a similar look to the one show in the Osprey book.

Obviously one the initial attractions of this character was the eye-catching heraldry. However attempting to paint it may, at first glance, appear quite intimidating but the final appearance is actually more down to using simple techniques than any artist skill on my part. I will however freely admit it did eventually prove to be a bit of tough bugger to paint (all this after saying in a previous post that I was sticking with simple geometric designs).

After the base colours, yellow at the front and the off white/grey for the rear, were applied I then used a small, square single piece of cardboard loosely stuck to the model horse with Blu-Tac. I lightly traced the edges using a H6 pencil, repeating the pattern until the front half of the horse was covered with faint grid lines. With the tricky areas around the neck and head I simply drew the lines in by eye. I used a H6 pencil for this as it is traditionally used to create trace lines, the hard lead produces a very fine, faint line (being a draughtsman by trade its nice to be able to return to using a pencil instead of a computer). Once satisfied with the pattern the alternate squares were painted and filled in with blue paint.

For the ermine pattern once again I traced in very faint horizontal lines across the whole of the rear of the horse. Then using the horizontal lines as a boundary guide I painted in short black vertical lines. Once that was done I then painted an inverted V at the bottom of each line. I tried to paint the three dots using a brush but repeatedly made a mess of it. I eventually tried using a cocktail stick, dipped the tip into black paint and placed the three dots on top of the vertical line (although I'm still spotting the odd one or two I missed). I'm not particularly looking forward to painting the wounded/dead version of the same figure if I ever get round to it (I might just cheat and stick to using generic casualty markers).
'A Knight with a Big Weapon'

The dismounted figure is from the 'Knights with Big Weapons' pack (MCF003) by Crusader Miniatures and is painted straight out of the box i.e. no modifications were made to the figure.

Unfortunately neither illustration in the Osprey book (unusually the artwork on the cover is not replicated inside the book) shows his shield but a quick search using Google 'all hail' Images soon revealed the appropriate details.

With hindsight I should have added the greenstuff to repilcate the fancy strips of material that form the sleeves in the original illustration but this only occurred to me after I'd starting to paint the figure.

This figure is a substitute for Sir Conrad in the Cry Havoc game who carries a yellow and blue checked shield and whose horse has a matching caparison.

In an interesting historical footnote Peter of Dreux's original sword pommel, displaying his coat of arms, actually turned up for sale in Damascus a number of years ago. Peter had been wounded at the battle of Mansourah (February 1250) where he had fought with Robert of Artois, the Master of the Templars. He was taken prisoner along with King Louis and other barons. He later died as a result of his facial wounds. The pommel is now in the Metropolitan Museum of New York.

Thursday, 26 July 2012

Billmen (Men-at-Arms with shield), Crusader Miniatures

Yet another set of figures taken from 'Men-at-Arms with spear + shield' (MCF030)- from the later Crusades range by Crusader Miniatures, the figures are only supplied with shields) but this time made to represent billmen (which you'll ready know as you've read the title).

For these figures it was a very simple and obvious change, with the bills replacing the spears seen in a previous post. The metal bills were from the Perry Miniatures (WR21 Bills) taken from their War of the Roses range.


The small circular shields were taken from the Perry's plastic WoTR box set.

For both the Cry Havoc/Siege games you need eight billmen in total, although again only three are actually required for Siege.

Wednesday, 25 July 2012

Halberdiers (Men-at-Arms with shield), Crusader Miniatures

Another set of figures taken from 'Men-at-Arms with spear + shield' (MCF030)- from the later Crusades range by Crusader Miniatures, although the figures are not actually supplied with a spear), but this time made to represent halberdiers.

The halberds, or to be more precise the halberd heads, were taken from the Perry's plastic 'EuropeanMercenary Infantry' set. I cut away the plastic shaft and then superglued the head onto a wire spear shaft.

It may not be historically accurate (or it may be, I'm not entirely sure either way)  to have halberdiers equipped with these small shields but the figures should look slightly odd without them.The left arm is held tight across the body; without the shield it looks as if the figures are holding their stomachs.

The small round shield (targe or buckler - delete was appropriate), was taken from the Perry's plastic WoTR box set.
For both the Cry Havoc/Siege games you need twelve halberdiers in total, only three being actually required for Siege.

Tuesday, 24 July 2012

Spearmen (Men-at-Arms with shield), Crusader Miniatures

These miniatures are the latest in my on going Cry Havoc/Siege project. These four figures are taken from the late Crusades range by Crusader Miniatures, pack - 'Men-at-Arms with spear + shield' (MCF030) although you'll need to supply your own wire spears. There are the usual four pairs of identical twins per pack.
Crusader Miniatures MCF030 - Men-at-Arms with spear + shield

All four of the shields carried by the spearmen are genuine, historic heraldic designs. Three of these shields are based on medieval floor tiles from Shaftesbury Abbey mentioned in an earlier post. I will detail the family heraldry used on the shields when I post the relevant mounted knight figures, one is already painted and is waiting in the photography queue.

I've kept to very simple geometric patterns as I haven't plucked up the courage to attempt any heraldic animals such as lions and griffins etc.

The gambeson (padded jack or arming doublet) was painted to resemble natural, undyed linen or wool.

I have sixteen of these spearmen figures in total, but I have already used some to depict two other types of soldiers for the Cry Havoc and Siege project, both of which I intend to post very soon.