Showing posts with label Cry Havoc. Show all posts

Thursday, 15 November 2012

Ox Wagon, Perry Miniatures

Yes, I'm finally back on the wagon! Well, at least painting-wise (apologies for the awful pun). This is the first set of miniatures I've painted since at least September but this isn't the new set of figures I promised in the previous post, which I hope to complete and post on here shortly.

This is the 'Ox wagon, (includes wagon, baggage, 4 oxen plus drover, woman and child) 'Code: WR24 currently £20.50 from Perry Miniatures.

Opening up the two boxes, you are confronted with a multiple of metal and resin components. Most of the parts are obvious, for instance the ox come with separate heads but I couldn't work out what four particular items, which looked like bent pitchforks, were supposed to be. After eventually checking their website I found that they fitted vertically over the top of the wheels and fixed to the carriage. I left these off the final simply because I didn't like the look of them. I'm sure they are authentic given the Perry's reputation for accurately but I thought they just looked a bit odd.


The set comes complete with three human figures the drover, woman (with a baby) and child, shown above. As the set is part of the War of the Roses ranges the figures are suitably detailed however my brother reminded me that he had picked up another figure that would also go well with this ox set.


I have no idea who the manufacturer of this figure is, my brother found it in a back room of Spirit Games in Burton in a pile of second hand figures. The figure still had traces of paint and a fair amount of flash on it but I can only guess that it's quite old. After a quick clean up I repainted him. The only thing missing is his jar of cider and a straw in his mouth.

Using the same technique I had previously used on the trebuchet model I've made the figures removable. This way I can use the original figure for medieval/Cry Havoc games and the other (mystery) figure for any period from the 17th C onwards.

The resin luggage is nicely detailed, there's even a big old cauldron hidden in amongst there if you have a close look.

Thursday, 8 November 2012

Great Round Tower Hourding


This is the latest WIP for my 'little' Great Round Tower side project. The Tower itself isn't finished but I have managed to complete the hourding itself (hurrah!).
Hourding Detail

The colour choice for the tiles was easy, these were simply painted to resemble slate. As I've previously stated I had intended to finish the woodwork a more standout colour scheme, namely red. And I did indeed paint this part of the model red. Not entirely happy with the results I left the model alone while I was trying to figure out the stairway and entrance (in fact, this is still very much an ongoing problem).

However on a recent holiday in the south east of England I had a chance of mind. On the very last day of our visit (we finally managed to visit thirteen castles in total, that's not counting forts, towers, churches, manor houses and other historic sites) we arrived at Dover castle, still one of the largest and most impressive castles in the country.

It was within the great square tower itself at Dover where I had the opportunity to speak to one of the guides. The interior of the keep has been recreated to how it may have looked during the time of Henry II's reign. Ironically (at least I thought so) as the building is listed the walls couldn't be painted so the wall hangings have been introduced to give the impression of the colour scheme. Every detail would have been made to impress, including the choice of the colours. Blue, green and red painted furniture would have cost a small fortune. The guide informed me that, for instance, the blue colour would have been made with lapis lazuli which was sourced from as far away as northeastern Afghanistan. Green was made from the mineral malachite.

It was with this in mind that I decided to repaint the hourdings to resemble plain wood. As I had previously wasted a small pot of Citadel paint with my previous effort I headed to the nearby DIY store (B&Q) and purchased a few test pots of emulsion. I eventually ended up using Crown Ultimate Cream Dark matte finish. The colour is quite similar the Citadel's Baneblade Brown but at around £1.50 for 75ml for a test pot is a bargain, especially if you're painting a large scale object, but I would recommend watering them down slightly.

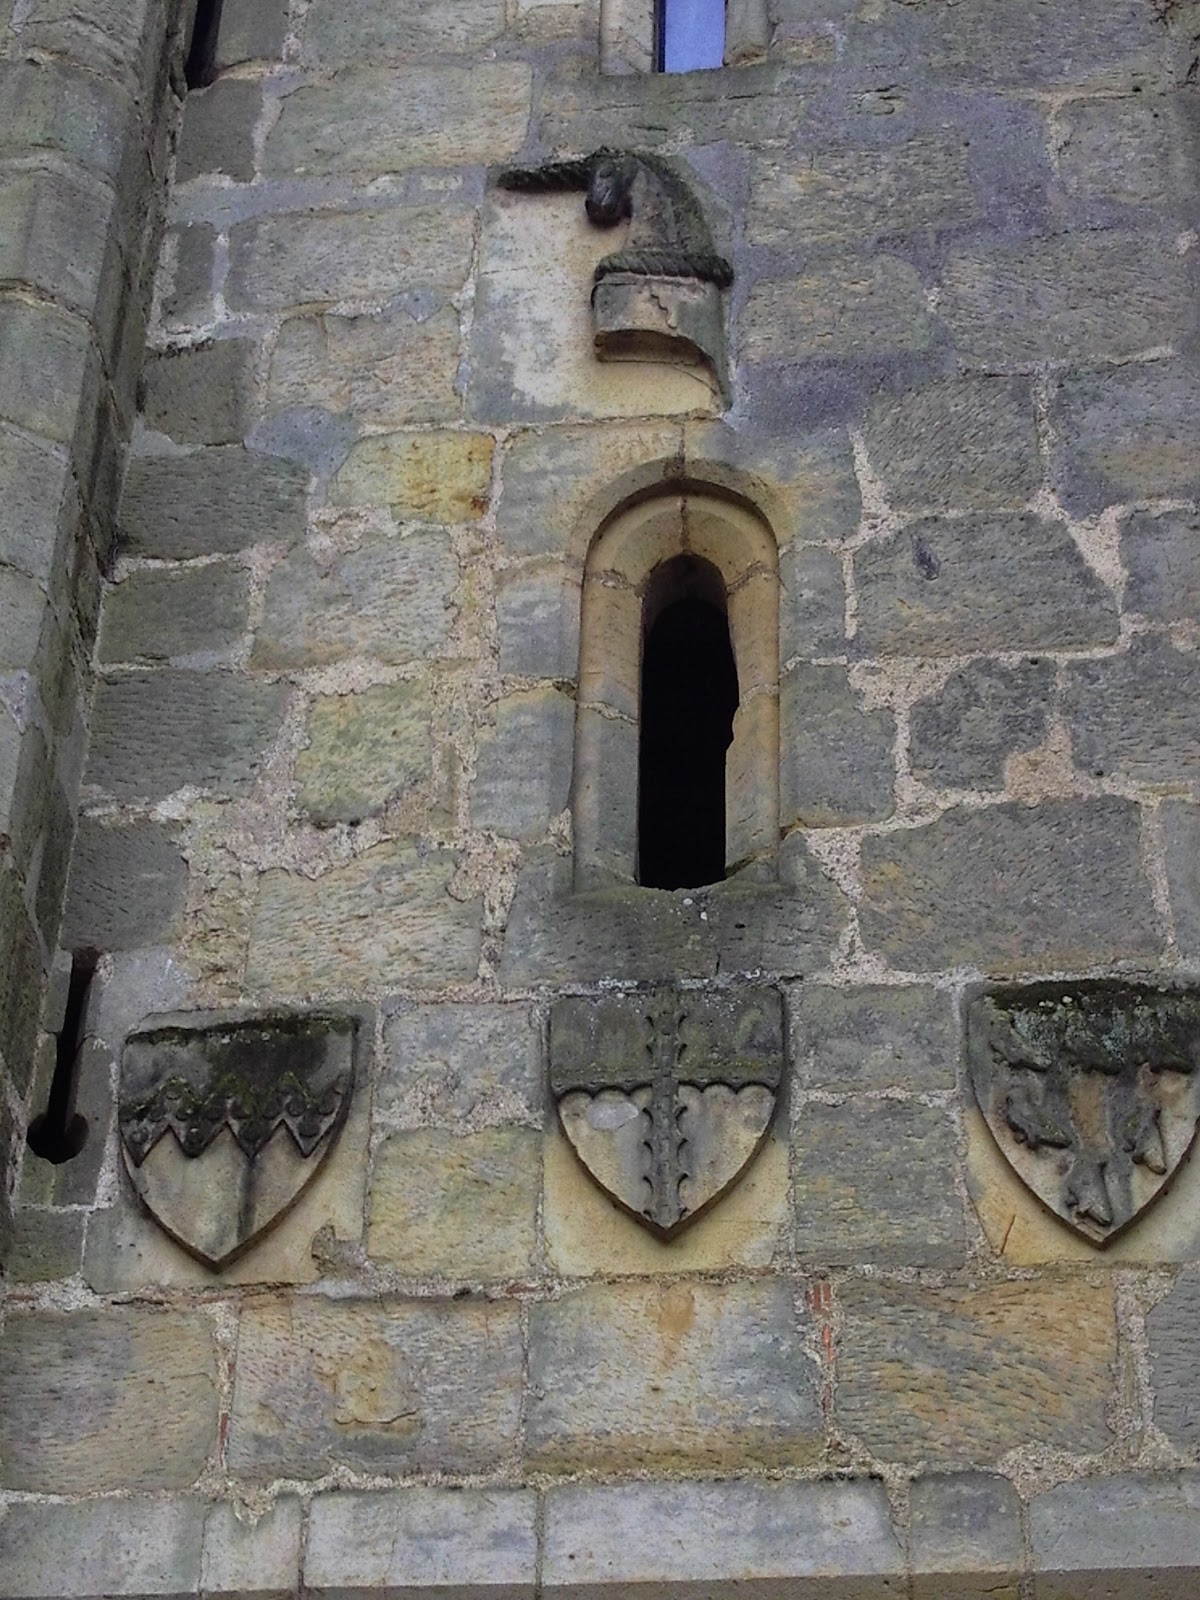
The hourdings were painted in the new colour scheme but with a small exception. Next time you visit a castle take a look above the main gateway. Sometimes you can spot the builder's family coat of arms carved in stone. Nice examples can still be seen at Bodiam castle.

Wardeux, Dalyngrigge and Radynden family shields. The carving above the shields represents the castle's builder, Sir Edward Dalyngrigge, tilting helmet complete with unicorn.


There are also several very large (modern) kite shields above the King's (?) gateway at Dover. So I thought I'd try and recreate something similar. Coincidently Dover had been defended by Hubert de Burgh, builder of Skenfrith, against Prince Louis in the great siege of 1216 (and again in 1217). I painted the vertical timber pieces using the coat of arms of de Burgh as a refernce. The unusual pattern, known as vair, is based on heraldic representation of patches of squirrel fur in an alternating pattern of blue and white.

"The squirrel in question is a variety of the red squirrel. In the coldest parts of Northern and Central Europe the winter coat of this squirrel is blue-grey on the back and white on the belly, and was much used for the lining of cloaks called mantles. It was sewn together in alternating cup-shaped pieces of back and belly fur, resulting in a pattern of grey-blue and grey-white which, when simplified in heraldic drawing and painting, became blue and white in alternating pieces." - Wikipedia

Happily there were two timber uprights that were positioned either side of the doorway, this enabled me to place a shield centrally above the doorway (this was down to pure luck rather than design). The shield is a taken from a Google Images file of de Burgh's coat of arms, stuck to a piece of cardboard and then trimmed to size. Now I only have to worry about making that infuriating entrance porch and the curved flight of steps!

Friday, 14 September 2012

Great Round Tower Hourding WIP

"Hourd - A wooden platform hanging from the top of a wall. An archer standing on it could fire arrows at enemies close to the walls below."
Cadw.wales.gov.uk
Great Round Tower Hourding WIP
The painting muse continues to elude me therefore I've been concentrating on my 'little' side project a model of a great round tower based on Skenfrith castle all this week. After concluding a few decisions regarding the main tower such determining that the roof will be fixed in place I have also decided that the internal floors will be separate (you'll have to trust me on that one, it will all make sense when they're complete). It seemed logical to go the whole hog and attempt to make the wooden hourding (fighting platform).

Detail of interior
Having sorted out those issues I then thought to make the actual hourding completely removable from the tower itself, the idea that I could use the finished model over more time periods, which sounded a clever idea at first but when it came to make the thing I realised it wasn't going to be that easy. The fact that I'd added the semi-circular projecting turret to the main tower and that the whole fighting platform structure had to be made to clear the walls and angular tower roof made things awkward to say the least. Obviously the original wooden hourding (also spelt hoarding) has long since disappeared from the castle, so my efforts have been based on the illustrations from the guide book.

Initially I drew a plan of the tower onto a piece of MDF and planned the hourding onto this. Regular readers won't be surprised that I went about this the hard way. Rather than making the necessary dozen or so main supports in one go I made them as I went along (not recommended), so that they all vary slightly in size, length and angle. As I wasn't actually sure how the entire structure would work I thought it would be better it I made a complete small cross-section before attempting the whole thing. This is why the model isn't exactly symmetrical (it's a weak excuse but I'm sticking to it). Once this was section was complete I worked my way around to complete the ring using PVA glue to act almost as a tack weld on the wooden coffee stirrers so I could pull apart any bits that went wrong. It was around this time I also realised that I would need to make allowances for both the doorway and chimney piece.

Once I got to the tricky bits, the doorway and the chimney, I made the frame work fit round them with a lot of cutting and carving to the wood work. This also involved copious amounts of swearing, which I find helps.

The roofing is made up of cardboard to represent slate tiles. I had considered using coffee stirrers to act as planking, it would have been a lot quicker and easier to produce but as far as I can tell the wooden fighting platform would have originally been more of a permanent feature of the castle.

Rather than cutting and gluing hundreds of individual tiles I tried a slightly different method. Instead I cut strips 10mm wide strips from old cardboard boxesets of (appropriately enough) Fireforge and Perry plastic medieval figures. I then cut slits into these strips at regular intervals, cutting a few of the tiles shorter and at angles to add variety, you could make the tiling far more regular and uniform but with mys method it looks more interesting. I had initially covered each section separately in tiles copying the pitched roof of the main tower but thought this didn't quite look right. So I removed these (again with a certain amount of industrial language at my lack of forethought) and instead built up a continuous layer of tiles running around the structure, fixing the strips with PVA glue. Once this had hardened I then 'painted' the whole sections again with slightly watered PVA to help set all the pieces in place properly. This makes the entire thing rigid and fairly robust. This whole process is obviously a quite tedious and boring job but I think it is worth the effort in the end (well I certainly hope so when it's finished). 

Reconstructions of medieval interiors such as at the Tower of London, Dover castle and St. Teilo's church look surprisingly gaudy to modern eyes so I am considering painted the exterior woodwork in relatively bright colours, which oddly enough my brother had been also been thinking and he suggested red. Hopefully I should make more progress next week on the main entrance and staircase.

Wednesday, 12 September 2012

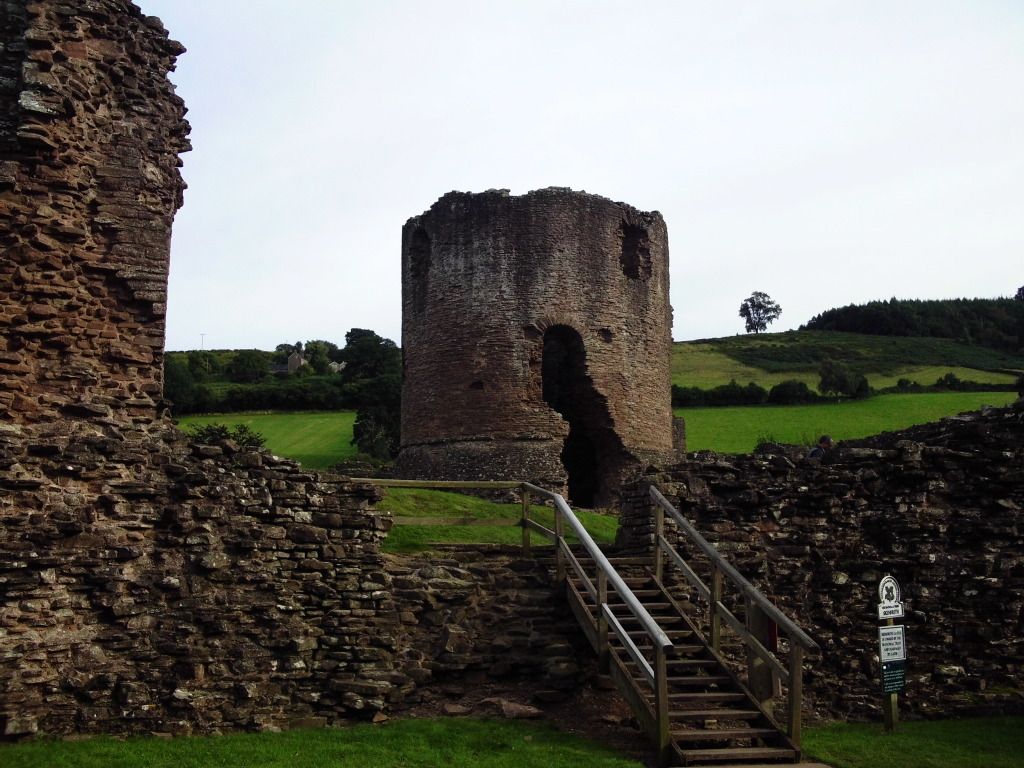
Skenfrith Castle, Monmouthshire, Wales

Skenfrith Castle
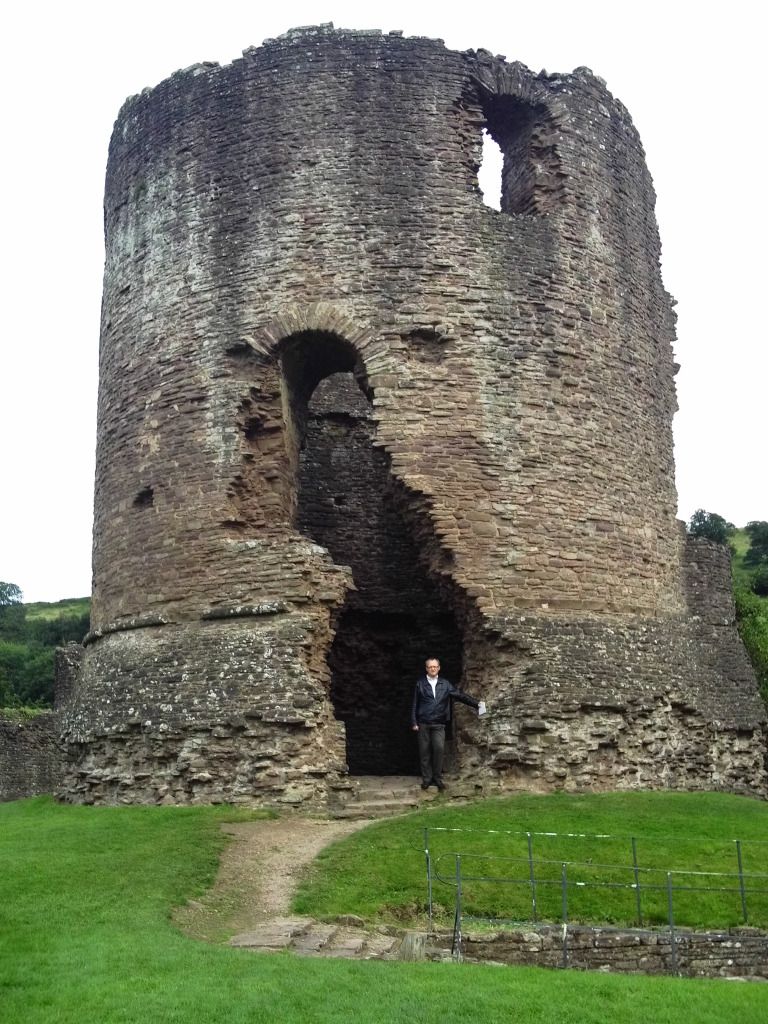
Skenfrith castle, along with Grosmont and White Castle (or Castell Gwyn or Llantillo) are known collectively as the Three Castles. Although its not the most impressive of the three (in my opinion that would be White Castle) and it doesn't even have a particularly interesting history (unlike its neighbour, Grosmont) Skenfrith remains one of my favourite castles (yep, I'm an unashamed complete castle anorak). Located in the Monnow Valley in the Welsh Southern March, the castle sits next to the Monnow river which still forms part of the border between England and Wales and flows into the Wye at nearby Monmouth. Its attraction, apart from the fact it's in a beautiful part of the country and it is free to enter, is that it also inspired the castle map/plan in the boardgame Siege, something I'd thought for years and have only recently been able to confirm. As a direct result of a recent visit to this castle, via Cardiff, that I started to build a model of the Great Round Tower.


Great Tower seen through the remains of original gatehouse
 
The visible remains of the castle were built by Hubert de Burgh between 1219 and 1232, replacing an earlier earth-and-timber version thought to have been built shortly after the Norman conquest. There may even have been a Roman presence on the site as Roman pottery has been found there during excavations.

Semi-circular Projecting Turret


Hubert de Burgh (1175 - 1243) was a veteran defender of the sieges of the castles at Chinon, Loire, France and Dover (1217). It is thought that he was inspired, as were William Marshall and Walter de Clifford, by castles built be King Philip Augustus as they bear a very strong resemble to a series of castles built by this French monarch. Philip Augustus (1180 - 1223) built no fewer than twenty round great towers, generally between 13.5 and 18m in diameter, all so them had three floors and very few arrow slits. A prime example can still be seen in Villeneuve sur Yonne, Yonne, Northern Burgundy, built between 1204 - 1211.
The plan on Skenfrith also resembles the plan of the Louvre of paris, in that it was a quadrangle with boldly projecting towers with a round donjon (keep). The remains of this castle can see be seen underneath the Louvre museum.

Curtain Wall
Note the four distinct layers of construction

Sally Port

Although very similar to French examples Skenfrith boasts a combination of several design characteristics that are only seen on a very small number of castles, all of them located in Wales. These include Bronllys, Powis built by Walter de Clifford who fought with De Burgh in the Welsh war of 1231 and Pembroke Castle, where the great round tower was built be the famous William Marshall who, not surprisingly, was an ally of Hubert de Burgh.
Three of these distinctive features include:
  • First floor entry above a battered base marked by an offset spiral stair to the upper floor,
  • Roll mouldings at the external batter,
  • Semi-circular projecting turrets.
So if you ever spot one of these features on a castle you too can now bore your partner and/or friends with this useless information :)
 
Minnow Rover
Castle just to the left behind the trees.


St. Bridget's church
 
Parts of the nearby church, St. Bridget's are contemporary with the castle. It features a quite unusual tower. There are a number of interesting items within the church which are worth to checking out.

If you have an interest in medieval history Skenfrith, Grosmont, White Castle and Monmouth, birthplace of King Henry V, are all worth visiting.

Friday, 7 September 2012

Great Round Tower WIP - It seemed like a good idea at the time..

A.K.A "You're gonna need a bigger boat...apartment"
 

I'm currently enduring a massive hit of what I can only assume is the equivalent of writer's block (painter's/artist's block?). For weeks figures nearly finished are still littering my desk, but I still can't motivate myself to even pick up a paintbrush (literally ). Hence the distinct lack of posts of recently completed figures. It is during these periods I normally resort back to modelling until the painting muse returns.
 
As I'm sure what is a common trait amongst my fellow modellers/gamers I'm always on the lookout for items I can use to enhance the gaming table, be it coir doormats (they make ideal wheat fields), coarse green scouring pads (hedges), complementary hotel shampoo bottles (chimneys) or even coffee stirrers (wooden planking) etc.
 
It was in this mindset that I found myself lingering around the prototype area at work with real intent. Working in R&D I get access to some quite random material, one of which is sample rolls of vinyl foil, but it's not the foil that interests me, it's the packaging. Recently one of these samples arrived in a large (160mm dia. x 1500mm long or approx. 6" dia x 4'11" long) protective cardboard tube. Immediately I saw this the cogs in my brain slowly started to tick over because of a recent daytrip I enjoyed with my brother. One of the places we visited was one of my favourite spots in the country. The more I looked at the proportions of the tube the more I convinced myself that I could make a model of the same great round tower of the castle.
 
 
No prizes for guessing the name of the castle but you will get massive kudos from me if you do. The real castle features a combination of several design characteristics that are only seen on a very small number of castles in the UK and all of these are located around one particular region; the inspiration for these castles is thought to have come from the owner/builder's experience of campaigns and sieges in France. It forms a well known group with two other nearby castles. Another clue, and more significantly for this blog is that it was actually the real life inspiration for the castle map from the game Siege, which I always suspected but was only recently confirmed (Gawd bless the internet) when I read an online interview with the game's designer. Or you can wait until next week when I will post photos of the real thing.
 
 
The only problem is its size. The more I look at it, and work on it, I repeatedly stop and think to myself, "Oh blimey, I may have bitten off more I can chew with this big bugger." I still have a number of decisions regarding the piece, such as: 
  • Do I make the roof removable?
  • Do I make the internal floors removable?
  • If not, do I fix the whole model to a textured base?
  • Do I go the whole hog and make a wooden fighting platform to run round the top of the tower?
  • Do I try and make matching curtain walls and domestic buildings? (If so I may have to move house to make room).

Wednesday, 29 August 2012

Trebuchet - Part 2 of 2

In this post I will concentrate on the base. I'll go into a bit more detail with this for reasons that will soon become obvious.

Normally I would simply fix the crew to the base as I have done with previous artillery pieces. However because of the Cry Havoc/Siege's unique causality recording system I thought it would be nice not to fix the crew but allow them to be interchanged to show them in at least two of the their states (healthy/wounded or stunned/dead).

Therefore as I was making the main base from cut-off pieces of 4mm MDF I needed to figure out a system that would let me change the figures around. 
After a great deal of pondering and false starts resulted in this cheap and cheerful alternative to buying a special slotted/sabot base for the artillery crew. Using the method described below will give the look a diorama style base but will also allow the practical removal of the figures as required with the Cry Havoc/Siege's rule system. A bonus is that the base will stay relatively thin. 

If you're going to have a go at this method of basing then I would strongly recommend allowing plenty of space to position your model AND figures when you're planning your layout and dimensions of the base, especially if you intend to sand down and/or bevel the edges. I made this fundamental error and had to start all over again after discovering that I couldn't even fit a single figure onto the base properly - d'oh!

I used a few lengths of plastic sprue, ideally the same thickness as the base used for the figures. This ensures that the base of the figure will sit flush with the raised surface of the main base. As plastic sprue is rarely square in section use a sharp blade or shade down one edge so that it forms a ninety degree to the large base. Then bevel the outside edge.

The beveled edge doesn’t have to precise as this will be covered in flock and grass but a shallow angle will help in creating a better final visual result. Remember that its real purpose is to ensure that the figure base blends in with the raised main base as closely as possible.

Try to use an original edge to form the inner side of the pit for the figure if possible, as this will be guaranteed straight and also will be visible when the figure is removed during play. 

Place these plastic strips around a base you tend to use for your figures. When you are happy with the length and position of the strips, drop a small amount of poly cement onto the joints. I wouldn’t recommend using superglue as there is a very strong possibility of sticking the entire assembly, together along with the figure base itself, to your work surface. Using a poly cement at least allows you a few minutes to safely remove the figure and reposition the strips if necessary. I am, naturally, speaking from experience.

When fully dry you can then remove the sharp corners and blend the edges together with sandpaper or a blade. This is now ready to be fixed to the main base. 

Ensuring that the eventual position of the figure won't interfere with the main model, fix the plastic locating square the main base. Try to ensure no glue spreads over into the ‘pit’ as this with be visible when complete.

When texturing the figure engineer's base I used larger stones and bushes to break up the straight lines of the base.

This technique now seems that obvious and simple I’d be surprised I haven't seen it before (actually I probably have and have just convinced myself that it's my idea). I was thinking about calling this method ‘Matt’s Patented Hollow Base Locating Technique’ - catchy title, I know.

The model was painted with a combination of Citadel and Vajello paints.


I've since added a few more tufts to try and break up the outline of the holes.

The 'stone' balls are made from a hard foam-like material, given to me by John from the Pensnett Model Makers Society, I whittled (you can't beat a good whittle) each of the balls into a crude circular shape and left them to look like rough hewn stone. 

Tuesday, 28 August 2012

Trebuchet - Part 1 of 2

This small model trebuchet detailed in these two posts was made as a direct result of a very frustrating encounter with an awful 'Finecast' version from Games Workshop. I may give a blow by blow account in a future post if I can ever be bothered to finish it. The parts are currently lying in a pile, bent and broken, somewhere in a storage box.  I did nevertheless manage to divert a complete disaster by using the resin kit as a template to create the one detailed in this post and which will explain why it looks similar.

The base of the not exactly FineCast (?) GW version,
the less said about it, the better.
Anyway back to my version. This model has been made mainly from balsa, with hardwood round dowel, plastic sprue, copper wire, wooden coffee stirrers and model chain for the various detailing. 
All new and improved WIP hand-built balsa version,
note the original location of the winch. 
As I've just mentioned I used the original individual model parts from the GW model as a initial guide for the main framework. I used lapjoints wherever the beams crossed each other, which were easy to make with balsa. For the main throwing arm/beam I used a hardwood dowel as I thought balsa wouldn't have enough linear strength. I gradually dry-fitted the components piece by piece until I was assured that all the parts went together correctly before they were glued in place.
On my command, unleash the Werther's Originals .. sorry, I meant... 'Unleash Hell!'

As I wanted to add a slide for the stone balls, a feature seen in medieval illustrations of trebuchets, it gradually dawned on me that using the GW model as a guide wouldn't work. The stone and sling would fowl the spindle for the winch mechanism. With this in mind and recalling numerous artillery pieces from various re-enactment societies I moved the spindle and placed it at the very rear of the model.

The counter weight is made from the ubiquitous wooden coffee stirrers, the bolts were made by simply chopping off small sections of a cocktail stick. Once made, I filled the box with scrap pieces of foam and then topped it off with small pebbles to represent large boulders and then filled the gaps with sand all stuck in place with copious amounts of PVA wood glue.

The sling is made from the thin metal wrapper from a tube of tomato puree and all the rope/cables are made from copper wire stripped out from electrical cable. The slide itself is made from wooden coffee stirrers.

At this stage I was considering adding a ratchet mechanism using plastic card but I stopped, put my tools down and actually thought 'That's enough, it's only a gaming piece not a museum piece." 

The model does (or did before I glued everything into place) actually work in the sense that both the arm and counter balance can freely rotate and fully swing. However, I did made the counter balance too large and it hangs too low; in a full scale version it would mash into the framework and do more damage to the crew than any enemy castle.

Tuesday, 7 August 2012

Men-at-Arms (with shield), Crusader Miniatures

Just a quick update for my ongoing Cry Havoc project.
Billmen
These are the completed billmen; eight are required in total for the combined Cry Havoc/Siege scenarios. I've trimmed off some of the spikes of the bills so they look less uniform.

Spearmen

These are all Men at Arms (MCF030) from Crusader Miniatures, now twenty four in total. Another eight are currently being painted, mainly as spearmen. I've already painted their shields using the rest of medieval Shaftesbury floor tiles as a painting guide.

Tuesday, 31 July 2012

Sir William Montagu (Montacute) - Knight, Crusader Miniatures

This figure bares the arms of Sir William Montagu, alias de Montacute, 2nd Baron Montacute (c. 1285–1319) and is the first knight I've painted to match the medieval tiles. His arms, argent three fusils on fess gules, are quite distinctive.


The Montagu family was an old (probably dating back to the Conquest) West Country family who held lands in Somerset, Dorset and Devon.

Montagu saw service with Edward I during the ongoing wars with Scotland and also went on the serve Edward II. He died in Aquitaine, October 1319, where he had been sent be the court to lessen his influence on the king.

His son, also called William, was created Earl of Salisbury. These arms, quartered with those of Monthermer, would remain visible in various coat of arms including those of Warwick the Kingmaker for years to come.

As you'll be able to tell I'm being quite free and easy with the historical time range with my figures for this onging Cry Havoc project (my toys - my rules). These figures are the first knights to be completed that were inspired by the medieval floor tiles from Shaftesbury abbey, Matching spearmen spearmen (seen in this previous post - Link) will complete the small (tiny actually) retinues.

Medieval Floor Tile - Shaftesbury abbey
 
As the note by the floor tile states:
"It was this Montacute (Montagu) that was in a dispute over the ownership of Sherborne castle in 1341 with Robert Wyville, Bishop of Salisbury, which nearly resulted in a trial by combat."

I will go into more detail about this fascinating 'what if' historical in a future posting i.e. after I've finished painting Montagu's adversary, the Bishop of Salisbury.
Montagu's (rather small) retinue
All these models are from Crusader Miniatures, painted straight out the box with no modifications.

You might have noticed that I haven't painted the horse's caparsion to match the shield. Although this would have been relatively easy to do this figure is a substitute for Sir Gilbert in the Cry Havoc game. This character wears a yellow surcoat and carries a white shield with three red stars (or if you want to be technical - argent, three mullet gules) therefore I decided to mirror the illustration from the game and keep the caparison plain and simple.