Friday, 30 May 2014

Marder III M (German Tank Destroyer) - 1/48 scale, Tamiya

This model of the Marder III M (German Tank Destroyer) was given to me by Ade as part of our ongoing Bolt Action desert project. Although the kit is 1/48 scale it is visually close enough to suit 28mm range of figures (which is generally quoted as being 1/56 scale).

From the Tamiya instruction sheet:

"During WWII, Germany produced many open-topped tank destroyers using the chassis of obsolete tanks. Among these was the Marder III series, which was based on the 38(t) tank made by the Czech company CKD (later BMM) and developed to counter Russian T-34 and KV-1 tanks."

As far as I know this type of tank destroyer didn't actually serve in north Africa but according to the info sheet the Marder III Ausf.M were painted in overall Dark Yellow, individual units then applied their own Red Brown and Dark Green camouflage patterns over the base colour to match local conditions. This particular model is finished with decals are for that of the '1st Company 348th Tank Destroyer Battalion, 348 Infantry Division, Belgium Spring 1944' and was painted in a simple two tone shade of yellow/sand. My logic was that I use this model in European or desert scenarios and it wouldn't look to out of place although I find it odd though that a unit serving in Belgium would opt for a simple dark yellow camouflage.

This model has been made as a gaming piece and not a military modelling display item. For instance I've left off certain items (I'm not telling you which bits though) but the initial idea was to paint and finish it as an example of simple weathering techniques. I videoed this process using various different methods to show how relatively simple is to produce half decent looking results. One technique I've never tried before was 'salt weathering' technique which is to use salt grains (I used model railway ballast as well) to produce a look of chipped paint. Another technique used was to apply weathering powers which achieves the look I always wondered about whenever I looked through military model magazines.
Note shiny exhaust. The black dots are actually a decal, something I only
noticed I had missed off after the model was finished (hence lack of matt varnish.)


The final video(s) will hopefully eventually feature on Ade's channel Wargaming For Fun.

On Monday I'll be announcing the start of a special giveaway/competition type thingy with a special prize for one lucky follower, so make sure you pop over to have a look (I know, I'm such a tease).

Thursday, 22 May 2014

Imperial French, Franco-Prussia War - Baccus 6mm

Regular readers may recall brief mentions that in my own particular lead/plastic pile are a number of 6mm figures. My brother bought the Franco-Prussian War starter set from Baccus at the Derby Wargame Show (when it was held at Derby Uni buildings which shows you how long ago it was, over two years?). I knew he was interested in the period but I had been subtlety (obviously too subtle) trying to convince him to buy larger scale figures "Oh look at these lovely 15/28mm figures" and such like, trying to put him off buying the Baccus figures for purely selfish reasons including: 
  1. They are tiny, 
  2. They are full of detail (they've even got bloody moustaches! I ask you) and 
  3. There are literally hundreds (and hundreds) of them. 
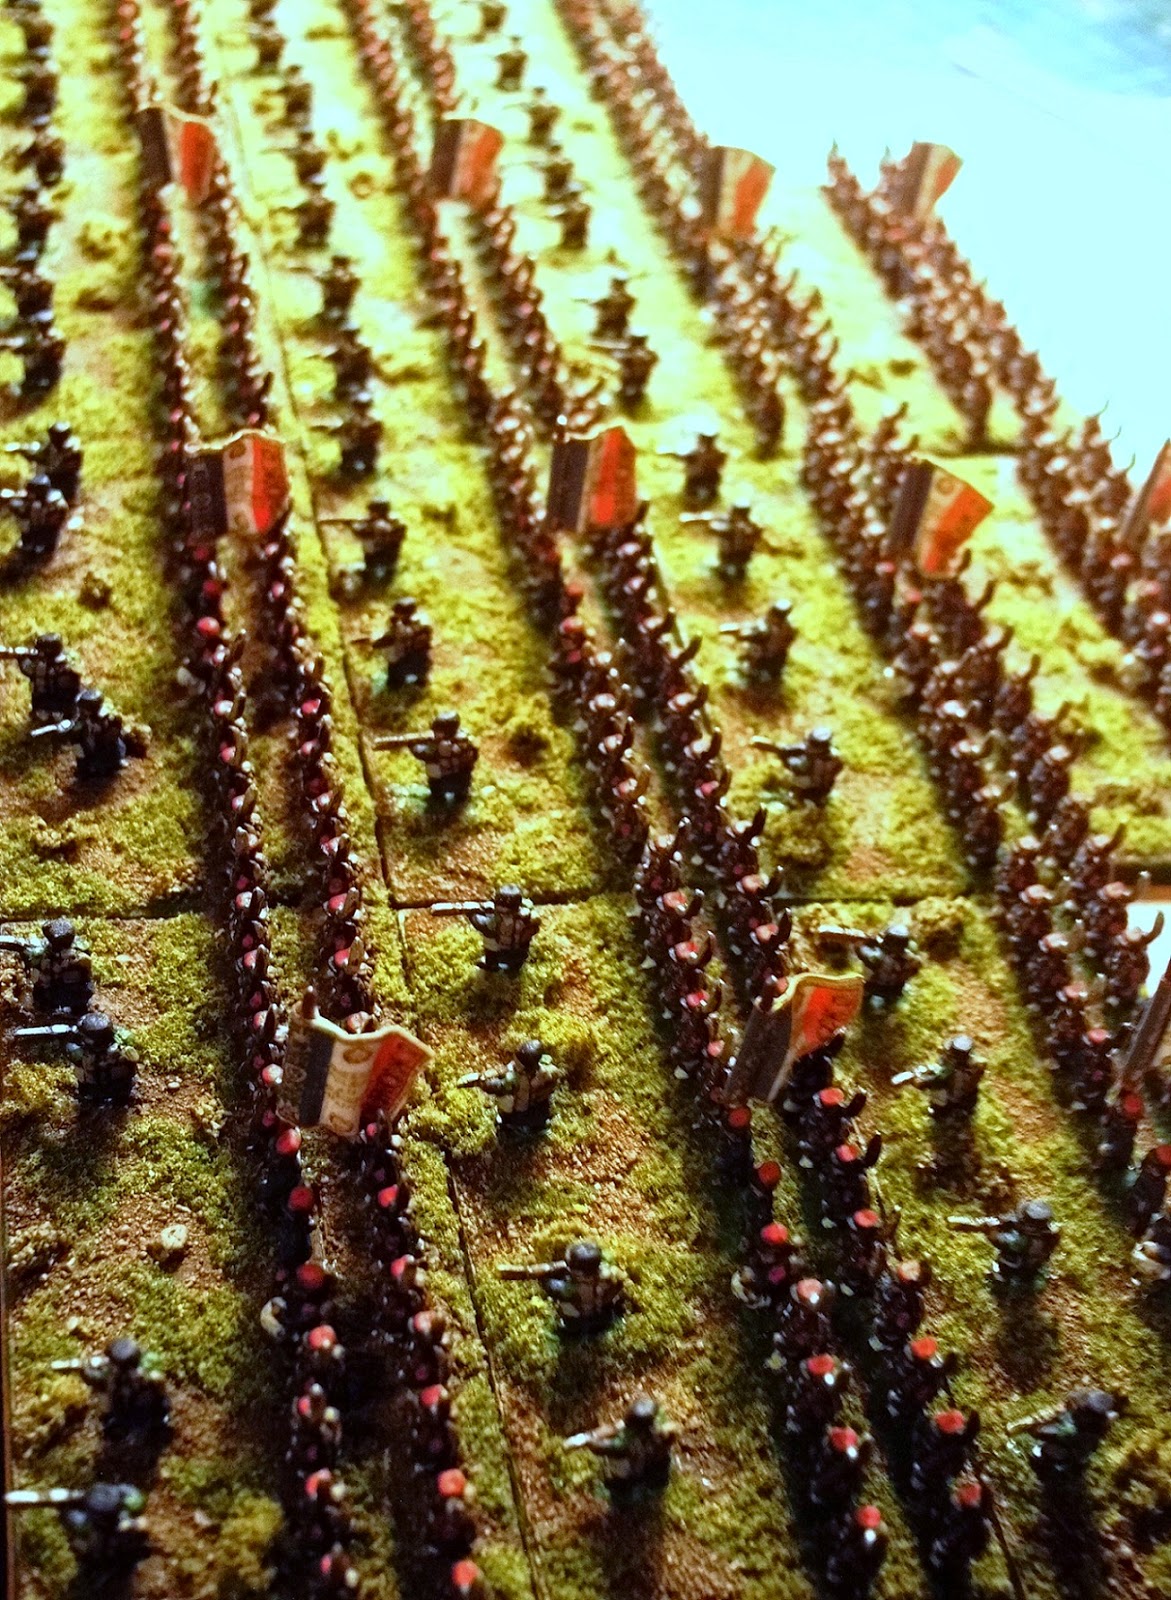
The pictures show some of the initial force of the Imperial French Army, three hundred and eighty four figures to be precise, which consists of the French Imperial Infantry Booster Pack (two hundred and eighty figures) plus a few stands from the starter pack. There should be three hundred and ninety two but with two of the bases I've left the skirmishes off, something I'll repeat with more of the bases because with the Polemos rules you don't actually need to place skirmishers on the bases. In fact if you read the rules one of the first things it states is that you don't actually really need any figures at all! You can simply play the game with plain MDF bases as long as their marked up correctly; it made me laugh anyway as I thought it was a very frank and honest (or mad) approach from a company that should be trying to sell you figures.

These figures had been languishing on the 'to do' painting list for so long because I honestly wasn't looking forward to starting them because:
  1. 6mm figures are really tiny. Don't believe me? Go find a rule and measure out 6mm...see, it's tiny. They're about knee height to a grasshopper or a 28mm figure. 
  2. They are full of detail (Moustaches! Have I mentions that these all these 6mm figures have moustaches, yes ALL of them) and finally, 
  3. There are hundreds of the little buggers. To misquote Colour Sgt.Bourne (Nigel Green) from the film Zulu... "Frenchies - thousands of 'em." Well, around fourteen hundred in total for both armies as it eventually turned out. 
After the guilt of delaying starting on the miniatures became unbearable I finally prepped the entire force and then...ignored them again as they looked overwhelming. I felt like Gulliver in the land of Lilliput. After yet another long delay with my brother occasionally asking, "When are you going to start on those 6mm figures? "They're next on the list, honest" (they never actually were).


Finally I realised I had to make a start if only to stop my brother nagging me. However once I had started to get into the rhythm of painting them (a block and batch technique is definitely the way to approach these) I started to actually enjoy it. Readers may be surprised to note that I don't generally enjoy painting, viewing it almost as a necessary evil, I much prefer modelling and building stuff.

Seen en masse they do, even if I do say so myself, look impressive. And this is still less than a quarter the figures to paint, there are the rest of the French, the entire Prussian army and some of their allies to paint so around fourteen hundred in total. The best thing is that I know it's achievable, hopefully completed by the end of the year. To achieve the same look using my normal 28mm figures would, I honestly think, take me a lifetime to complete. The only 28mm figures even approaching this effect is my ECW Royalist/Scottish army. I know for a fact that I'd lose interest in them way before looking like the massed forces of these 6mm miniatures.
Ironically, after saying all that, I won't be switching to 6mm figures in the foreseeable future. This is simply because I have far too many 28mm figures waiting in the 'to do' painting list, all of them I want to complete eventually As mentioned previously I'll be concentrating on more skirmish style games in the future. Right, I'd best get back to painting the remainder of this little lot.

Thursday, 15 May 2014

Cheap Plastic Cowboys

As I suspect is true of a number of fellow modellers/gamers, I often stealthy wander over to the toy section of any superstore or discount store I happen to be in. It's in these sections that you can find cheap toys that can be utilized for your tabletop. As I don't have any children, just in case I'm ever accosted by an overly helpful assistant, I have even created an imaginary nephew called Barry. Now Young Baz (I'm quite a happy go lucky pretend uncle, I don't even take the mick out of his awful name) is a very versatile character and is aged between 3 and 15 (which probably reflects my mental age as well) depending on what type of toys I'm looking at. 

This avoids the very embarrassing situation (and real life situation) when you're paying at the till when the operator asks you: 

"Are these toy cars for your nipper, what's his name, how old is he?" 
"Err no...they're for me actually." 


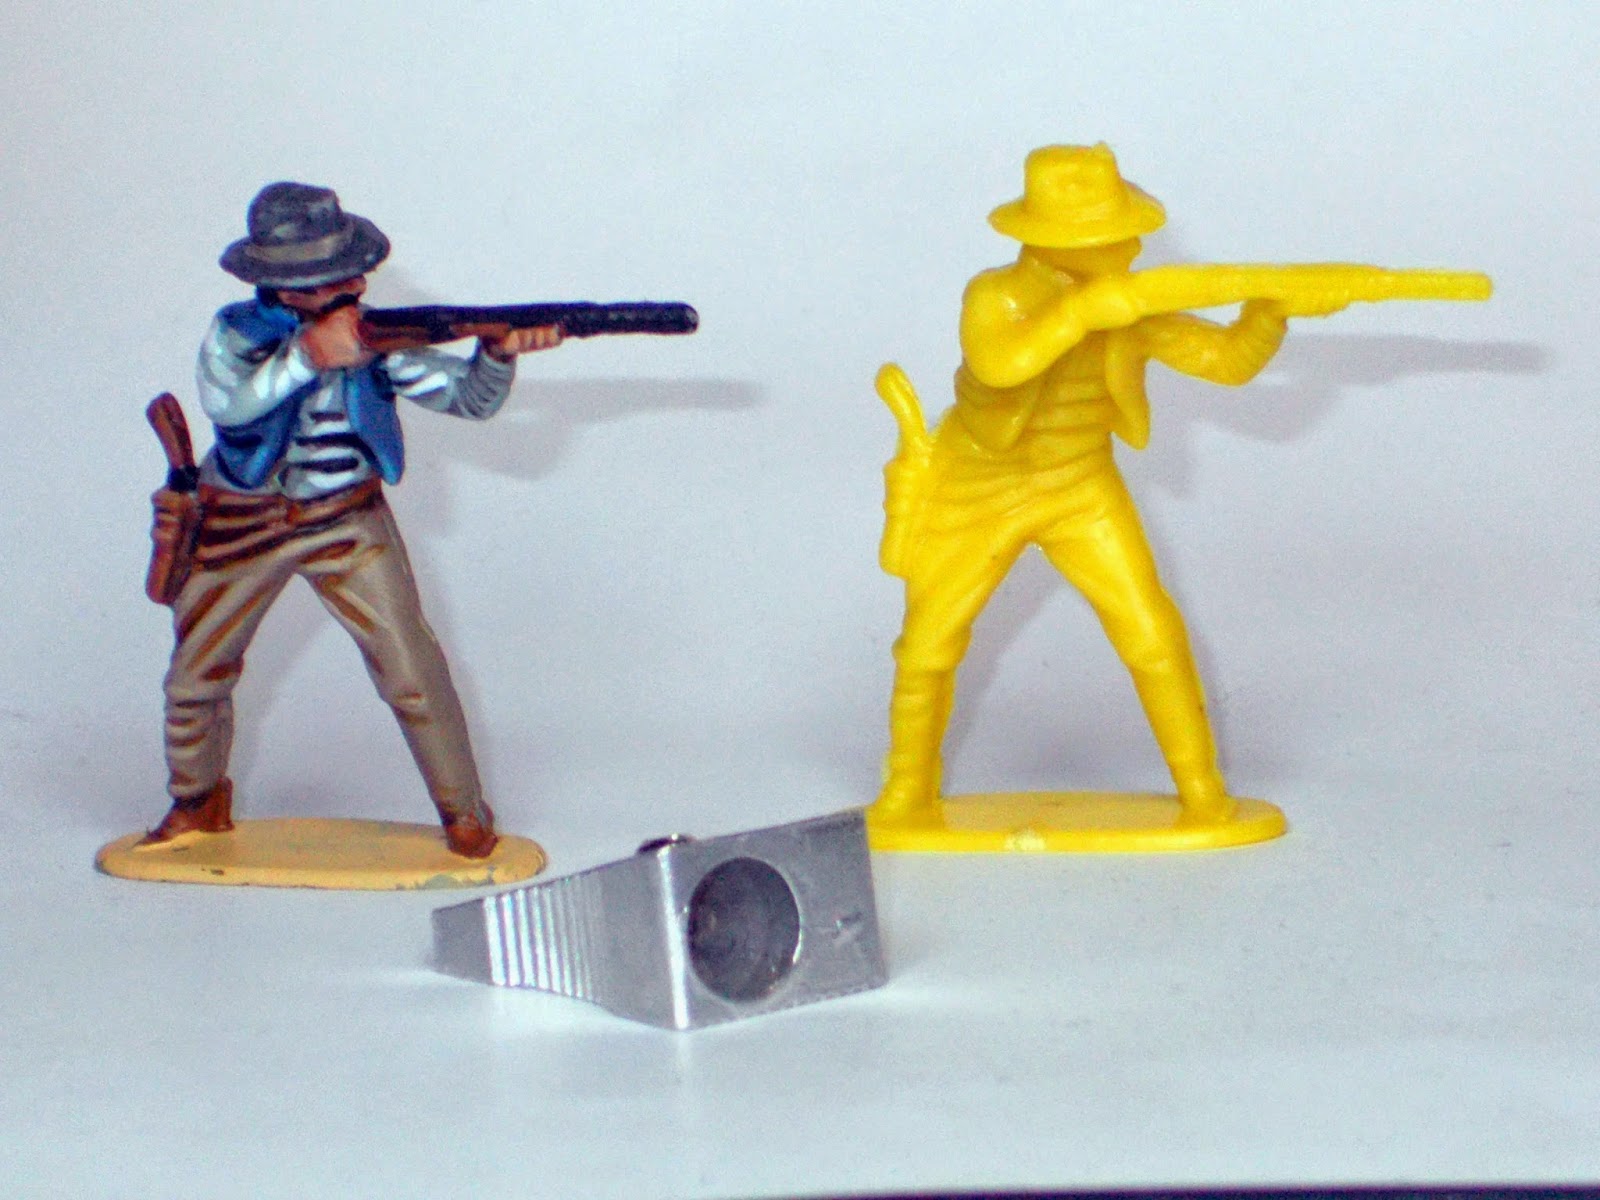
Anyway, back to reality, it was a regular jaunt to Morrisions that I noticed a big tub of brightly coloured plastic 'Cowboys and Indians' (other sets were available such as modern soldiers and knights, both awful). The cowboys caught my eye because I instantly recognised them as (very cheap) copies of toys I had played with way back in the mists of time, or 'the 1970's' as people tend to refer to them nowadays. I have no cowboy projects planned, these were purely an impulse buy and nostalgia trip. 


The detail, or lack off, was initially a problem. The 'face' on most of these figures generally consisted of a blob for a nose. Luckily I soon accepted that this was probably for the best as I didn't really want to invest too much time and effort into things that are, after all, cheap plastic toys.

I've also been thinking about how to indicate the various size of models and figures when posting images online as sometimes on seeing a figure thinking, 'that's not bad for 28mm' then realising its only 6mm high. Unfortunately sometimes the opposite is true, 'nice 10mm figure...oh dear that's a 28mm figure, blimey.'
I have seen people use various coins as a reference, obviously using their own national currency, one pound, euro dime, yen coin etc. This is great if you happen to live in the same country or have a ready supply of foreign coins at hand. It could also turn the posts into more of a 'Various International Coins That I Have Found Down The Side of the Sofa' feature, which I'm certain no-one wants to see.
With all this in mind I tried to think about an object that is relatively small and is internationally recognisable. I recall seeing someone used a pencil sharpener as a size reference and realised that would prove ideal (well that's the hope, if anyone has better ideas please let me know). Even if someone has never used a pencilsharpner (which I suppose is possible in this digital day and age) everyone will know the approximate diameter of a pencil. So from now you will hopefully see a token pencil sharpener popping up somewhere on my photographs simply as a scale/size reference for the figures. You'll have to trust me but hopefully this will make a lot more sense when I start posting images of the 6mm figures that I've been painting for my Franco-Prussian War project.

Friday, 11 April 2014

Spring WIP

Following an impulse purchase by my brother I've been doing a lot of prep work on Mantic's Deadzone. The mechanics of the game appeal to me greatly, no modifiers to your dice roll which still manages to confuse my easily confused brain. The success or failure rate remains the same, you simply add or take away the number of dice used.

You get an awful lot of bangs for your buck with the Deadzone game, figures, terrain, dice, playing matt, cards, tokens etc. everything in fact that you need to play the game.

You get a number of nicely sculptured figures for two factions, one of which is the Plague. These figures have turned their back to the camera as they are quite shy (and rather ugly). I'll detail the figures properly one they are all finished, but here is just a brief preview.

I've mentioned previously that I have an awful lot of tiny figures waiting in the my painting queue, actually bought by my brother. In fact my brother buys an awful lot more figures than I do, which I paint. The figures in question are 6mm Franco-Prussian armies from Baccus. To give you an idea of the numbers involved you get 280 figures in a small booster pack and in the starter army pack you get nearly nine hundred figures. 

These are a sample of one base of 6mm Baccus figures that I worked on during March. There are twenty eight little chaps per base and I have ten bases to complete. These are part of my Imperial French army. This particular base hasn't been finished yet, it still needs flocking etc. I've already painted the majority of the whole forces from this particular booster pack.

If you look very careful you may see that the sculptor has even given the figures buckles, straps and even moustaches. I'm not even quite sure how he (or she) managed to do this. 

To give you a sense of scale the MDF bases are 60mm x 30mm (or just over 2" x 1"). 

Another project started (these projects keep stacking up) were the German AfrikaKorps (DAK) from the Perry brothers, which made a quest appearance on one of the Bolt Action videos. These particular figures have been modified slightly, arm swaps, Green Stuff etc. nothing too major. I've recorded the process for these figures but again I'll detail the mods online once they've been painted. These are just a couple of examples of the half dozen individual I made.


I'm currently trying to work out a special give-away pressie. This will be for either achieving 200,000 page hits or 250 followers, I haven't decided which one yet although I'm edging towards the follower option. The prize will be unique to the winner and possibly for a runner-up as well but, as I said, I'm still trying to work out the details. Or I might save myself the trouble and offer it straight to Fran or Ray.

Now all I have to do is paint 'em.

Tuesday, 1 April 2014

Celtic Cross

This model is very loosely based on the famous Carew Cross in Pembrokeshire. After seeing the original in southwest Wales I thought I could make a model of something similar but not an accurate copy as that would be way too much like hard work.

Like most men of a certain age I enjoy a good whittle which I suspect is a bit of a dying art. The model itself has been whittled down from a hard pink foam using a very sharp scalpel (I'm always pleased when I made a model and don't manage to injure myself in some manner). I've no idea what is actually is or what it is called but it's a product used in the automotive industry and is apparently, size for size, more expensive than Carrara marble. The material was procured by (in)famous Pensnett Modelling Club member Malc so its probably best not to know exactly how it ended up in his hands ("They are definitely waste off-cuts officer, Honest Malc said so.").

Thursday, 13 March 2014

Gravestones, Renedra Ltd

These pieces are taken from the Gravestone Set from Renedra, probably better know for producing the plastic figures for Perry's, Warlord Games Fireforge Games and others. The box comes with forty four various gravestones and two separate ravens, sculpted by Steve May from Immortal Miniatures (as it tells you on their website). 
Cross grave markers with additional slats.
28mm Crusader Miniature Man-at-Arms shown for scale
I've placed all the 18th and 19th century style gravestones together onto plastic bases but separated the simpler, older style stones onto singles so I can use these in medieval period games. After seeing at medieval illustrations (and a few modern ones still visible in northern Europe) I added two small lengths of coffee stick stirrers to form a roof for the cross.
A number of the stones are modelling at an angle, quite a common sight in old graveyards, well until Heath & Safety operatives started to push them over to ensure they were 'safe'. I've altered a few more to enhance the look.
28mm Crusader Miniature Man-at-Arms shown for scale (he gets around a lot, doesn't he?)

There are nicely sculptured details on the graves, vines, engraved text etc. and a very simply way of adding extra detail to your table top.

Tuesday, 4 March 2014

Great Round Tower

This, I'm very glad to say, is the completed model of the Great Round Tower based on the castle at Skenfrith. With expended delays it actually took just over a year to finish. In real terms it probably took about a two weeks to build but there were several times when this model was very nearly consigned to terrain heaven when I was sorely tempted to launch it into the nearby park via my size ten boot.  

Its torturous development can be followed by viewing these previous posts (click on the links for a blow by blow account).


The reason I decided not the fix the hourdings or the entrance stairway in place is a simple one. Travelling through  northern France you will often see medieval castles in a decent state of repair, for instance  the keep at Falaise which was shelled by the Allies during for WWII. It occurred to me that by making the woodwork removable the piece could then be used on the tabletop for a setting anywhere in between the 13th to the 21st century.
Hourding painting detail
If I thought the hourdings was complex, attempting the stairway and entrance was a different league. The model sat, ignored, for several months on my desk. At one stage I even moved it out of sight to avoid it causing me further annoyance. It was a trip to south Wales to see the original inspiration, Skenfrith and other nearby castles, that finally goaded me into finishing this project. Seeing illustrations and reconstructions give me a better idea of how to attempt this final part of the model, but this was still a very much a hit and miss affair. Several abortive attempts were made using bamboo barbecue skewers and Blu Tack to make a crude form of prototype. Sorry no WIP photographs as I was too busy grinding my teeth in frustration, uttering foul oaths and yelling various other forms of industrial phrases at the model. 
Internal view of the stairway
External view of stairway
Detail of small gatehouse
Using the skewers enabled me to work out the heights of the various vertical posts without wasting strips of hardwood or balsa. I won't attempt to describe how I made the stair treads fit as, to be perfectly honest looking back I'm not entirely sure how I achieved it myself and I'd have to admit it was through more luck than judgment that it worked.

The structure is held together with copious amount of PVA glue and threats of violence.
Detail of roof including mini shampoo bottle/chimney
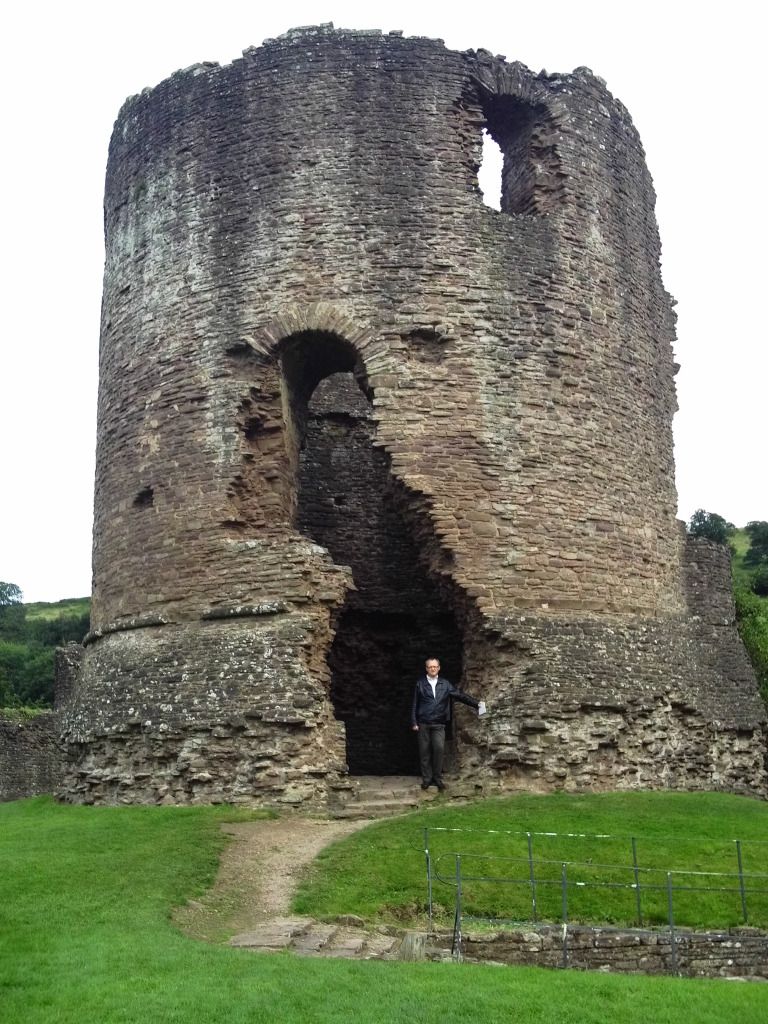
The Welsh original - with brother for scale.
Note the particular features of this style of castle:
  • First floor entry above a battered base marked by an offset spiral stair to the upper floor,
  • Roll mouldings at the external batter,
  • Semi-circular projecting turret (on the far right of the tower).

The model with 28mm figures for scale


For quite a while I pondered about the final colour schemes for of the model. The now familiar site of timber frame buildings painted harsh contrast of black and white is largely a Victorian invention. But relocated/reconstructed medieval buildings such as ones that can be seen at the Welsh National History Museum at St Fagan's proved to be helpful reference and yes, a number of the building are indeed painted bright white as a result of whitewashing. another is painted bright red, the colour was thought to be help scare away evil spirits. In the English county of Suffolk houses are still painted pink (the colour known appropriately enough as Suffolk Pink) thought to have been originally achieved by mixing ox blood or the juice of sloe berries into the plaster. 

However the bleedin' obvious occurred to me. The name of the neighbouring Llantillois Castle, known in English as White Castle, was the give away. The castle had obviously been plastered and covered in whitewash, therefore I decided to take the easy way out and paint this model white as well. 

Now though the question of painting a model so this size white without it appearing to look like an extra large toilet roll (or a kitchen roll - if you're posh) caused me to pause and consider my options. With these model I used test pots of paint from B&Q (a large UK D.I.Y store) as there is rather a lot of surface to cover. 

Shading and weathering adds considerably to any model but you obviously can't highlight white with a lighter colour. Therefore I had to find a suitable off-white paint to cover the entire surface of the building which would enable me to finish off with a drybrush using a plain white paint to pick out the surface detail. The entire model was given a brush over with a very diluted wash of various shades of brown and sepia coloured inks.

Well its certainly been a journey (that awful phrase Z-list celebs say on the telly whenever they've been in a show, paid a lot of money not to do much and manage to lose their dignity all at the same time, 'I've been on such a wonderful journey.') but I doubt I'll ever undertake anything similar to this for a good while.